
Did you know it's completely within your grasp to change the look and feel of every website you visit? That's right... you can change colors, move things around, and completely hide anything that gets in your way! 💪 Let's learn how...
No matter how many people took part in designing a single webpage, how complex the process is to generate it before sending it to you, how fantastically awesome it appears when it finally renders in your browser, every webpage boils down to a few predictable pieces. It has to, so that any browser on any device can display it correctly and reliably.

There's the HTML markup that defines which elements you see (tables and labels and headers, oh my), JavaScript code that defines what happens when you press a button or enter an invalid email address, and CSS styles that define how the tables look and where the labels should be displayed. They're all applied/running/whatever locally in your browser, on your device, and you have the power to change them or even stop them from running.
Some browser addons stop JavaScript code from executing, or prevent HTML elements from loading. But others, like Distraction Free for YouTube and Remove YouTube Recommended Videos, Comments (and even my own Hide Comments Everywhere) all work primarily by using CSS to hide elements. The elements are still there, but as they say.. out of sight, out of mind!
Using your own CSS
There's another browser addon, called Stylus, that lets you write your own CSS styles to hide or otherwise manipulate web pages to your liking. You can keep them to yourself or share them with others. Before we get there though, here's a brief CSS primer. Feel free to skip if you already know CSS.
When you reference an HTML element on a page to change how it looks, you use something called a "selector"... just a fancy term for selecting an element by its type, ID, or class name. If you want to read all about selectors (or anything else web-related), check out MDN's excellent documentation, such as this one:
CSS selectors - CSS: Cascading Style Sheets | MDN
An example using basic selectors
Until you read all that, here's a short example to make a few points. It applies a few styles based on type, ID, and class name, although you can get a lot more complicated when defining selectors to apply styles to an element.
When you're selecting elements on the page (aka DOM):
- Select types by using the name of the element type. (i.e.
div { ... }) - Select classes by prepending a period. (i.e.
.important { ... }) - Select IDs by prepending a hash. (i.e.
#notice { ... })
In the above markup, notice that:
- All
<div>elements are bolded and colored blue. - The elements with the "important" class on them are colored red.
- The element with the ID of "notice" has a blue border around it.
- The really important message is in a
<div>block and has a class name of "important". So first, it's bolded and colored blue, but then the "important" class overwrites it and colors it red. That's the cascading part of CSS at play, where you can "layer" styles over one another.
Hiding elements - out of sight, out of mind
You can use selectors on your own, for example to create "dark mode" versions of sites that are too bright for your liking. Another popular use, which I alluded to before, is to completely hide elements you don't want to see, like sidebars with ads or recommended videos that pull you further down the rabbit hole. 🐇 🕳
It's fortunate that most sites create sensible class names and IDs for sections of their websites that you might want to hide, like <div id="ads"> or <div class="comments">. You can easily attach styles to those elements, like in the following snippet where I easily (one line!) hide an annoying sidebar full of distracting (and entirely realistic) advertisements.
Simplifying life with Stylus
I mentioned the Stylus addon earlier, and how it makes it easy to apply your own styles, share styles with others, and import styles from others. It's available for Chrome, Firefox and Opera.
There's more info in their wiki, but briefly... after you install it:
- Open the site you want to make changes to.
- Click the "Stylus" icon and select the URL of the site under "write style for".
- Right-click the website and select "Inspect" to start looking for IDs and classes you can make changes to, then paste those into the Stylus panel that opens.

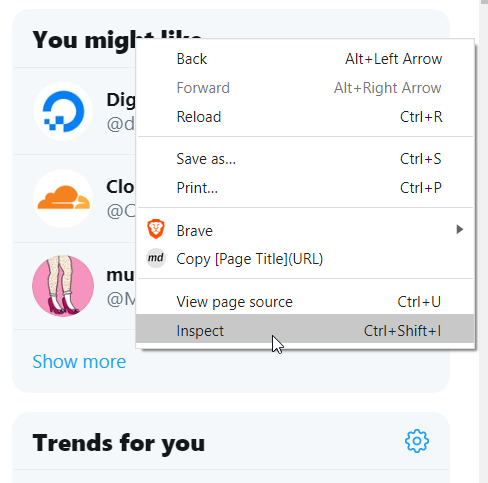
Finding the elements you want to modify
I'm not sure about Firefox, but Chromium-based browsers like Chrome, Opera, and Brave will highlight elements as you "inspect" the page, so you can clearly see which element is being referred to in the code. 👍

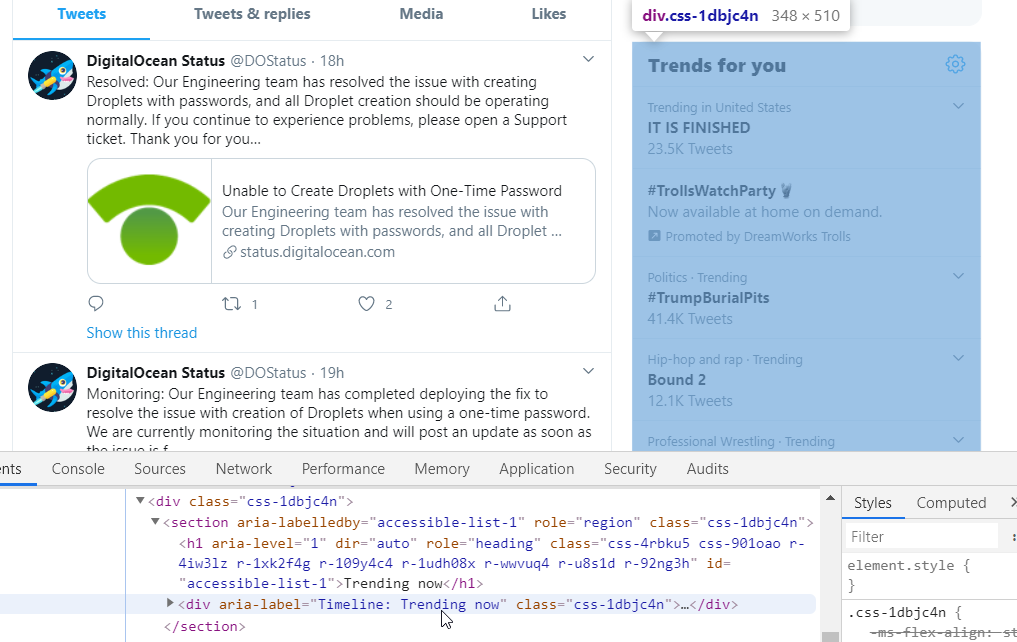
Some websites are really dynamic. In my experience, Facebook is the worst, with no IDs and class names that seem to be generated dynamically. It makes it really hard to find something reliable to reference.
Twitter is slightly better, with fairly consistent "aria-label" attributes you can grab hold of. When I showed you the basic selectors above, I didn't show you how to use attributes, but they're easy too. We'll take a look at them next.
Now modify them!
Once you know which elements you want to modify, there's nothing left but to do it!
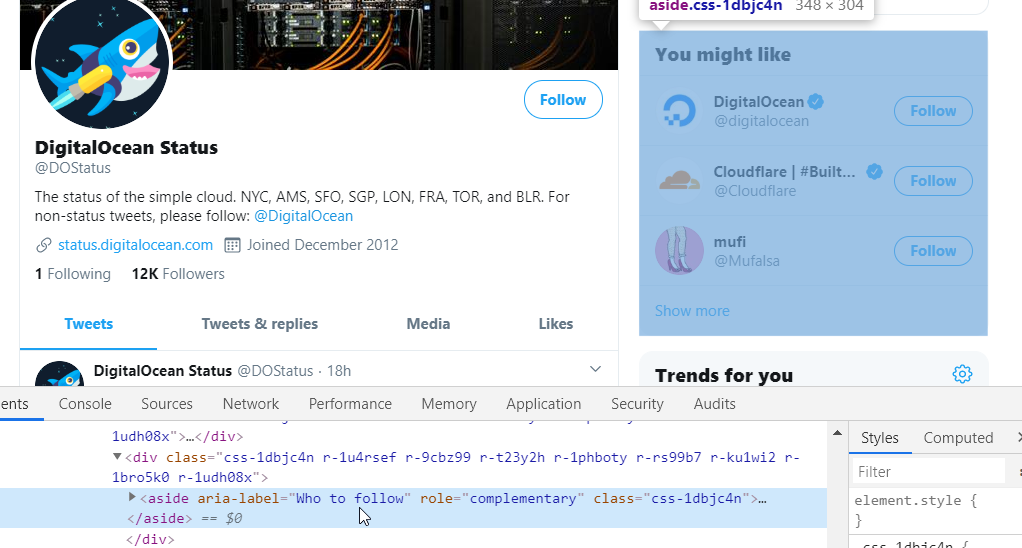
I mentioned Twitter so we'll use them.. they're great at finding ways to keep you on the site, which makes them a great candidate for modifications. I don't have an account, but quite a few businesses like to post system status updates there, so it's useful sometimes. The Trends section, and most everything else in the sidebar, is just a time-suck, so they can go.
Notice how attributes are referenced by enclosing them in square brackets. That's it! I included the element type (div, aside, whatever) to make it a bit more specific, but I could've just as easily left them out. Oh, and the !important flag isn't strictly needed either, but it ensures that your preferences override anything else on the page.
Don't reinvent the wheel!
If you put a lot of work into a style, you can share it anywhere you like. Just click the "Export" button and share the contents, which in my case look like this:
@-moz-document domain("twitter.com") {
div[aria-label="Timeline: Trending now"],
aside[aria-label="Who to follow"] {
    display: none !important;
}
}
There are sites like UserStyles too, that allow you to upload and download all kinds of styles, which can then be imported into your local Stylus. Note that that particular site is associated with another extension called Stylish, which Stylus is based off of.. use Stylus.
I won't get into too many details, but a few years ago Stylish added some creepy tracking stuff to their extension, and thus Stylus was born to remove said creepy stuff (and add some other functionality). Stylus isn't the only alternative, but it's the most popular right now.